Hello Everybody!
Happy Friday to you!
Today's project is going to be a little different than normal. I am doing a Blog Challenge for the first time! It is for Lessology which is totally a cool blog. The challenge was to use a brown paper bag and use an upcycled item. Go check it out! It's really cool to see how other people interpret the Challenge.
Here is my finished project...a trifold picture display with a hidden pocket on the side. First, I'll show you how I made the ghost, and then how I made the whole thing.

My upcycled item is the ghost. I love the ghost! This is how I made him...
I took a Target plastic bag (which I think works better than others because of the material it is made from)...

...and cut out a square about 3x3 or 4x4, I just kind of eyeballed it.

I draped it over my thumb (like a ghost) to make sure the size was correct.

I cut the handle part of my bag and made it into a ball.

Then I covered the ball with the ghost square and twisted the "neck" part of it. I tied a piece of white floss around it to keep the shape, and clipped close to the knot. I shaped the flowy part of the ghost and added googly eyes.

OK! Now to make the display, I take my lunch bag and measure it out. I fold my bag into 3 sections. I put the measurements on the bag because I am going to cover them up. The first thing I cut is a piece of black cardstock so that the back will be covered.

As I match up my cardstock, I use my bone folder to make clean folds.

Here's one of the flaps before....

Now after...

Here's what my adhesive looks like (I like old school photo splits.)

All 3 back sides are covered and adhered.

However, I didn't cut my piece big enough, so I took some black paint and went over the exposed bag.

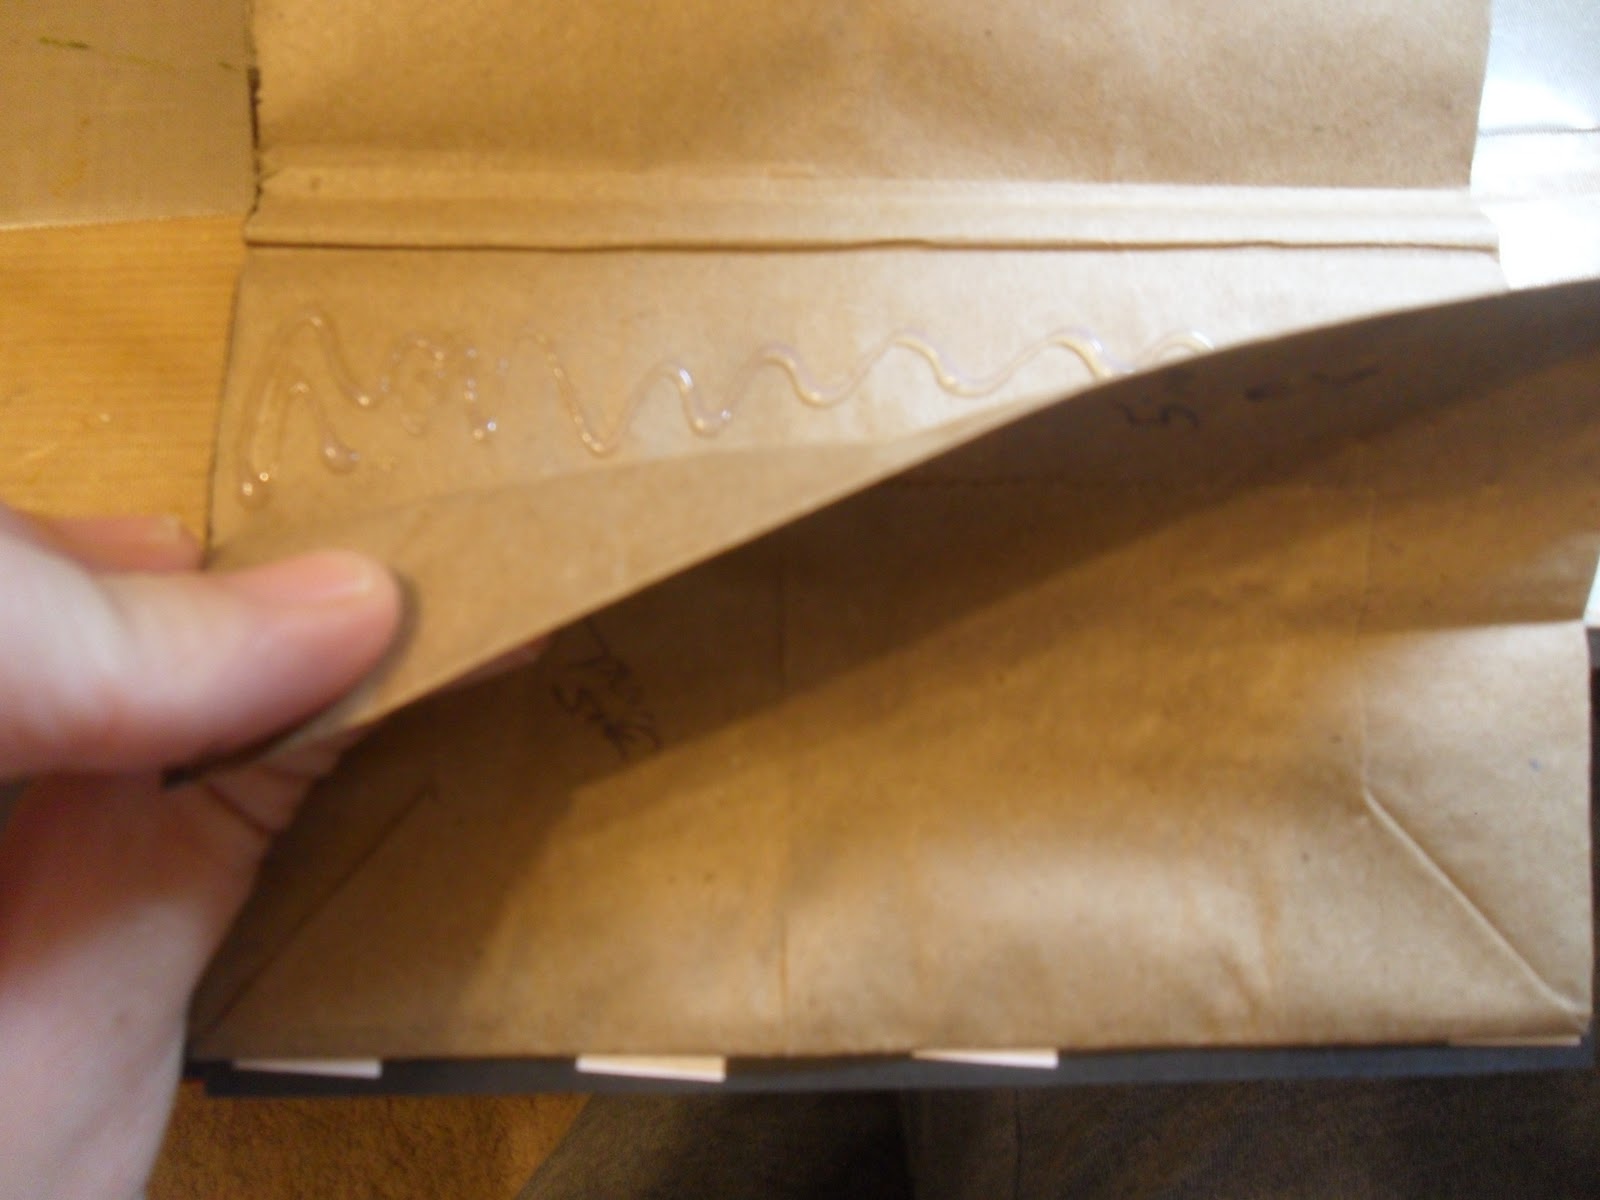
Using Glossy Accents, I glued the top parts of the bag to the cardstock.

Also, I glued the bag flap down. However, there is the opening of the bag which is on the side when "standing." Leave this alone because it will hold things later.
So one of the things I got for my birthday was a set of Martha Stewart spider web punches. I punched out black cardstock using the straight and corner punches.

Very cool!

I adhere my border to the paper bag side (which is now the front side) using red line tape.

Here is how one side looks.

Spider webs finished!

I cut a piece of patterned paper to cover the rest of the inside of the paper bag. I thought about doing each pattern differently, which you can totally do, but for me I chose one piece to fit in there. For me I wanted to make sure I had cohesion. I am entering my first contest after all!

I adhere the patterned paper and keep a black border so I cut off the excess.

Now the fun part begins ;)

I cut a 31 out of black cardstock from my new Cricut cartridge, Boys will be Boys. But I liked the negative better than the positive, so I'm using that.

I put candy corn paper behind the empty 31.

From these EK Success stickers I added "st" to the side of the one.

Now believe it or not, these are paper punch out letters that I bought at Joann's for $1 a long time ago. Yay! I found 3 of these letters a new home!

These letters go behind the 31 square so this is what the back looks like. I put them on with Scotch tape.

Here is the front...

So I put the Oct 31st in the middle center. I put 3 pictures on my display. One of them I mounted on black cardstock.

I added my upcycled ghost to the left hand top corner. I put a spider on the right side. The bat and glitter cat you see came from the foamies package I bought at Target a few days ago. I added googly eyes to make them more fun. Plus my husband loves googly eyes...so why not?
Now for the secret compartment! Because this is a brown baggy, the opening is natural. I put a tag there (cut from Cricut-George) so you could see the opening. I made a couple of tags so I can put the journaling on them.

I added a cute Stampin' Up spider (from a set of old Halloween stamps) to one of my tags. I added fun yarn to the tags.


And here they are gone. So you can display the tags either way. If you were giving this as a gift you could put a gift card in there.
This was such a fun project to do! Until next time my friends...stay innovative!

11 comments:
Oh wow! What an adorable project! Love the plastic bag ghost! So fun! :)
Thanks for playing along with us at LESSology!
I love how you used the Target bag to make the adorable ghost. This is so fun & festive for Halloween. Love your adorable project. Thanks so much for playing with us at LESSology. :)
What a fabulous altered project, love the step-by-step tutorial, thanks for sharing it with us at LESSology!
sensational, totally love all of this and what an amazing tutorial .... fabulous art-piece .... hugz x
Oh this is just wonderful! Love what you've done here!
WOW! Great Tut! Love what you did with the doggy bag...great project! Thanks for joining us at LESSology!
What an adorable project and such a fun use for a brown bag! Love that you turned it into a tri-fold frame. And love the fun Halloween theme. I have that Stampin'Up spider and just love it. ;) Your plastic bag ghost is adorable, too. I still like to make those with my daughter from tissues.
thanks so much for playing along with us at LESSology.
Fabulous tutorial and uber cute project! I can't believe this complete transformation! Love it all!
WOW WOW WOW WOW WOWWWWWWWWWWW! This is AWESOME! I loveeeeeeeeeeeee all the details and the little ghost! Thanks for the tutorials too! Thanks so much for playing along with LESSology! :):):):):):):):):):):)
Thank you to everybody for all of the wonderful comments! I'm am grateful for LESSology to bring everyone together!
I love your little ghostie, and how you incorporated the webbed border with the project!
Post a Comment